Overview
Once you have completed your takeoff in Ensign X, you need to move those quantities into the Estimating software so you can build up your estimate. There are two ways to do this:
- SQL file method — save your drawing, then import the generated
.SQLfile from the Estimating software. - Direct export method — use the Export to Estimating button in Ensign X to push the data across while both applications are open.
Both methods end with the same Import PDF step inside the Estimating software, where you assign services to sections. Choose whichever workflow suits your setup.
You can export at any point during your takeoff — you do not have to finish every drawing first. Some users prefer to export after each drawing; others complete all drawings and do one large export at the end. Either approach works. Once data has been sent across, Ensign X will not automatically send the same data again — it only exports items that have not been previously exported.
Method 1: Using the SQL file
This method is useful when you want to save your takeoff first and import it into the Estimating software at a later time, or on a different machine.
- 1
Save your drawing
After completing your takeoff in Ensign X, save the drawing to your cloud storage. When you save, the software creates a
.SQLfile in the same folder as your PDF, with an identical file name but a.SQLextension. - 2
Open the Estimating software
Open the Estimating software and navigate to the job or project where you want to import the takeoff data. Go to the Takeoff page.
- 3
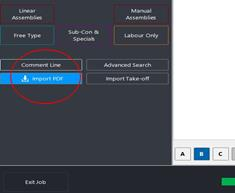
Click Import PDF
Click the Import PDF button in the bottom-left corner of the Takeoff page.
- 4
Select the SQL file
A file browser opens. Navigate to the folder where you saved the PDF drawing and select the
.SQLfile.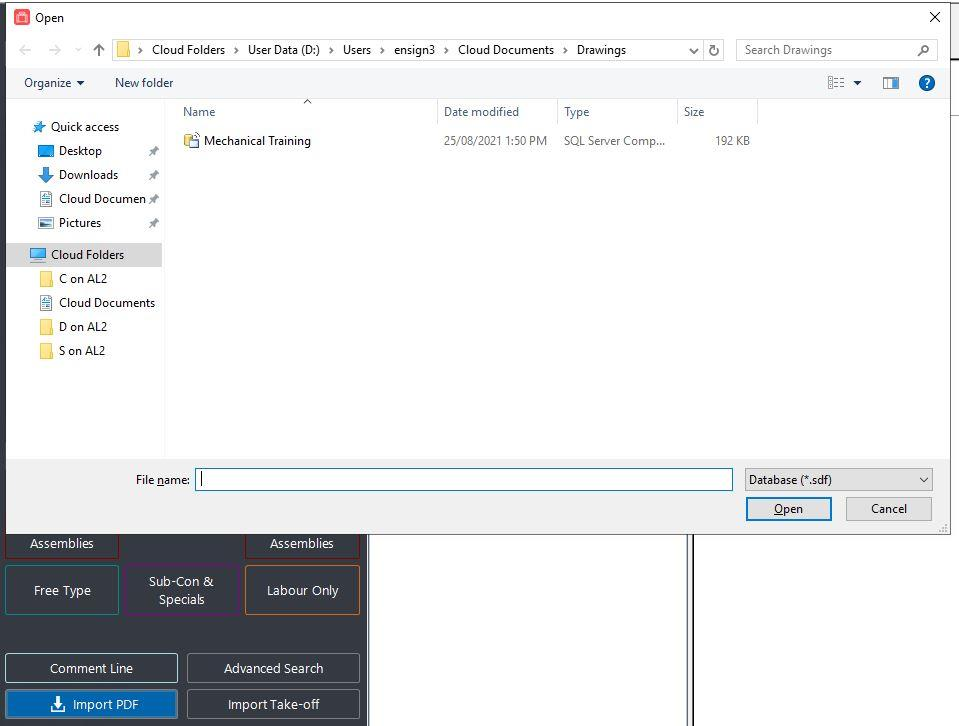
- 5
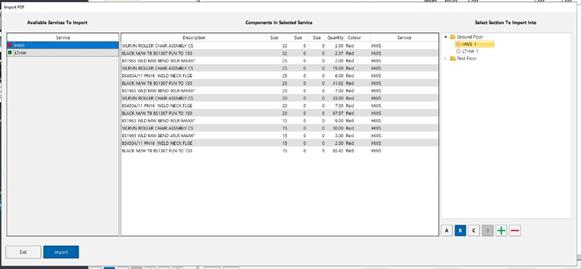
Match services to sections and import
A pop-up window displays the colours and services used in your drawing, along with the components in each service. It also shows which drawing each item came from, making it easy to identify the source.
Highlight the services you want to import on the left, then select the destination section on the right. Click Import in the bottom-right corner to bring the items into your chosen section.
- 6
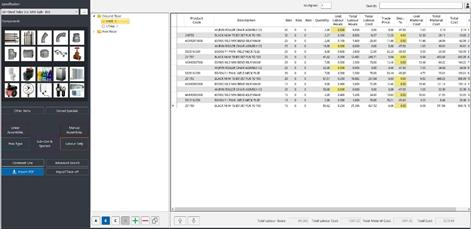
Verify the imported data
The selected items now appear in the Estimating software under your chosen section. Review the imported lines and adjust any details directly on screen — quantities, hours, costs, or descriptions can all be modified.

Method 2: Direct export
This method lets you push data straight from Ensign X into the Estimating software without needing to locate a file. Both applications must be open at the same time.
- 1
Open the Estimating software
Before exporting, open the Estimating software and navigate to the job or project where you want to import the data. Go to the Takeoff page, then switch back to Ensign X.
- 2
Click Export to Estimating
In Ensign X, click the Export to Estimating button in the toolbar.

- 3
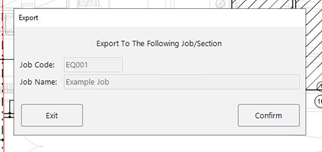
Confirm the job
A pop-up window displays the job code and job name of the project currently open in the Estimating software. Verify that the details are correct, then click Export (or Start/Confirm, depending on the version) to proceed.
- 4
Switch to the Estimating software and click Import PDF
Switch back to the Estimating software. Click the Import PDF button in the bottom-left corner of the Takeoff page.

- 5
Match services to sections and import
The same import dialog appears as in Method 1. Highlight the services you want on the left, choose the destination section on the right, and click Import. Repeat for each service until everything has been assigned.

- 6
Verify the imported data
The takeoff quantities are now displayed within the chosen section in the Estimating software.
The direct export method is generally quicker for day-to-day work because you do not need to browse for a file. The SQL method is better when you want to save the takeoff and import it later, or on a different machine.
Creating new sections during import
You do not need to set up all your sections in the Estimating software before importing. The import dialog includes A, B, C, and D buttons below the section list. Use these to create new sections on the fly — simply click the appropriate level button, name your section, and it becomes available as a destination immediately.
This is especially handy when your takeoff covers areas or trades that were not part of the original estimate structure. You can organise as you import rather than planning every section in advance.
Verifying the export
If you want to confirm what has been exported from Ensign X, open Edit Projects within the PDF takeoff software. You should see tick boxes next to each item that has been successfully sent. This gives you a clear record of what has been transferred.
Best practices
- Save before exporting — always save your drawing in Ensign X before using either export method to ensure all takeoff data is up to date.
- Check the job details — when using the direct export method, double-check the job code and name in the confirmation dialog to avoid importing into the wrong project.
- Label services to match sections — naming your services in Ensign X the same way as your sections in the Estimating software (e.g.
Lighting,Small Power,Containment) makes the import process faster because you can instantly see where each service should go. - Import in batches — you do not have to import everything at once. Select specific services and assign them to the appropriate section, then repeat for the remaining services.
- Use comment lines — any comment lines you add in Ensign X carry over into the Estimating software as takeoff line items, which is useful for noting assumptions or allowances.
- Review after import — once data is in the Estimating software, review the imported lines and adjust quantities, hours, or costs as needed before finalising your estimate.